Generations Metroplex
When the Titan class Metroplex was announced at Toyfair 2013 - see TFU for more pictures from the unveiling - there was great excitement because base mode Transformer robots had been out of vogue for some while. Effectively there's been just THREE since 2000: RID Optimus Prime, Armada Optimus Prime and Cybertron Metroplex plus a few not so good attempts in the Cyberverse line including Optimus Maximus. Equally large single robots had been out of vogue for a few years except as larger versions of existing characters. So a large Metroplex was much anticipated.Obviously this toy would invite comparisons with two older transformers: the original 1986 Metroplex and 1987'S 2 Foot High Fortress Maximus. As it happens my Generations Metroplex lives in a cupboard with both of these! I'd not got round to reviewing it at the time but two things have happened recently to get me interested in this toy again: Concept art has materialised which has made me think about certain features and a long awaited third party add on is now in my hands....
Metroplex isn't the only toy in the box: he comes packaged with Scamper, a new version of the six wheeled car transformer which was one of three extra toys packed with original Metroplex. His car mode follows the original by having two pairs of rear wheels and has a 5mm peg hole on his roof on which you can mount the red dual barrelled blaster that come with him. To transform him unpeg the arms from the sides of the toy, fold the rear of the car back to form the lower legs and reveal the upper legs then fold the waist forward before folding the chest down. The resulting black robot, with grey upper limbs and a red head, is a little smaller than most of the recently released Legends figures. There's ball joints at the knees, hips, neck, shoulders & elbows so his articulation is pretty decent. As well as the 5mm hole from his car mode, which is now on his back, Scamper's got 5mm peg hole hands that he can use to hold his gun. Fab little companion figure which will have some uses later.
Metroplex comes packaged in robot mode with one arm needing attachment. We'll start by transforming him into Aircraft carrier mode:
Straighten the arms and fold them out behind him. Push each leg in beneath the knee so the joint slides to the outer side of the leg. Bend the legs up 90 degrees at the waist and sit Metroplex down. Fold the kneepads down so they rest over the feet: there's some sculpted detail that their red supports rest against. Fold the front of the lower legs forward to form the front of the runway and reveal the rear. Push the upper legs together: there's some tabs on his left leg which recess into his right. Take the gun, fold the handle in, and recess the tabs sticking out the bottom into the slots at either side of the rear of the ramp. Extend the cannons out the front of the shoulders. Pull the ramp out of his right chest so it sits on the back of the launch ramp. Swing the head antennae so they point up. Fold the head forward and raise the targeting screen. Fold the top of his left shoulder forward to become a dual cannon and reveal a gunner station. Fold the front of his left chest down to reveal a moulded missile array.
Wow.
The shear size of this vehicle/base mode is incredible. I've seen it described as his Aircraft Carrier mode, and that's quite an appropriate description with the two long thin strips formed from the inside of his legs. You could eaily accomodate a couple of G1 jets on this, but using Legends jets of either the current or the smaller Legion size just makes it look even bigger. It's a shame that there haven't been any Autobot jets that can use it released recently. The runway deck is so big that it can comfortably accomodate the original Metroplex.
Really this toy, and this mode, is one that needs other toys to be used with it for it to be properly appreciated. The gunner station on his shoulder can easily accomodate a Legends figure: I've had Scamper sit in there but have also used the Autobot'a gunner Bluestreak. The backs of his arms, now facing up, reveal a whole load of useful features. There's a helipad on the back of what was his left shoulder while his right shoulder has a command center. The arms are covered in both 5mm and 3mm holes so break into your weapons boxes and tool him up with Arms Microns, Minicon weapons, Mech Tech, Cyberverse and the like. A repair arm can be folded out the deck. And, because it is his vehicle mode, the entire structure can roll along on the wheels under the toy: two under each thigh and each lower leg, one under the waist.
So where does the big red gun go? Well you can peg the handle into the back of his right shoulder and have it leaning over the toy. But the intention would appear to have been for Metroplex, like the original, to have TWO of these weapons and, again like the original, for the weapons to be mountable on the deck. If you look to the outer sides of the rear of the runways there's a raised edge. There's two thin red pieces of plastic sticking out the bottom of the gun which are just the right size apart to slip over this edge and fit into a slot which holda the guns on relatively stably. Of course to do this and make it look right you need two guns and sadly the standard version of Metroplex has just one, presumably as a cost cutting measure. The gun itself is a nice piece of kit, some decent sculpting including a number of 5mm peg holes. Like it's predecessor the gun is a missile launcher :-)
Metroplex is probably most famous for being an Autobot City though: To transform him remove the guns and fold the ramp in. Fold the twin cannon back over. Separate the runways. Bend each leg back 180 degrees under the waist. Rotate the waist 180 degrees. Fold the top of each upper leg out to the sides. Raise the foot slightly so forms a tunnel down the leg. Dlide the cannons back into the shoulders. Fold his right arm forward. Rotate his right arm so the elbow would bend in across the chest, but don't bend it. Open the hand on the forearm revealing a cannon. Fold his left arm back behind his shoulder. Open the top of his his left shoulder blade out to form a helipad and fold the cannons out of it. Fold the handle of the gun down and peg into the rear of his right shoulder.
Whereas the vehicle mode looks like it might be made for planes this is a vehicle mode for cars with the legs being transformed into roadways. It's possibly to run a car from the ramp at the end of the extended leg right the way up to the knee joint, a distance of about 40cm. The bays folded out to the side also have a ramp leading into them, but this time at the body end of the toy. Lots of 5mm weapons mounting holes still on the legs and the body, a larger helicopter pad and another gunner station, this time at the end of the arm. You can fit a couple of Legends in there standing and when closed, although the clearance isn'rt too big, just about fit a smaller Autobot car in the cavity. Scamper will just about fit and I imagine the likes of the old Legends Prowl/Bluestreak will fit too. My only real complaint about this mode is that the ramp leading out the chest doesn't reach the floor! If I was picky I'd say "could we have some Micromaster ramp connectors please?" but I know that the chances of getting a connector for a 25 years old toy is minimal.
Let's transform him back into his robot mode: Fold the cannons down and fold up the left shoulder. Swing the left arm forward. Close the cannon on the arms. Fold the feet forward and fold the repair bays in. Swing the legs 90 degrees under the toy. Fold the front of the ramps up to become the front of the lower legs. Slide the legs out at the knees. fold the kneepads up. Turn the waist 180 degrees. Fold the head back. Position the arms. Fold the handle down from the gun, open the hand and slip the block on the side of the handle into the slot on the palm of the hand.
Actually I'm rather impressed with the gun handles: it solves the problem of how to have an articulated hand that can hold a weapon properly! It's not just the big red gun that has these on them: the two black guns on the shoulder have an identical handle that folds out from them allowing the robot to hold them. It would be nice if a third party manufacturer could make the handles on their own with a 5mm hole at one end and a 5mm Minicon peg at the other end. These would let Metroplex use standard Transformers weapons and act as additional buildings for his city mode. Stick hole on one side of the middle and a post on the other and you'd have a great universal adaptor for use with other toys too. The shoulder guns are held in place by a 5mm peg on them which sinks into the side of the slide out shoulder cannons. Properly attatched there's some black plastic tabs that stop the guns moving but if you pull them out slightly they can rotate just like the original Metroplex shoulder cannons.
At 2ft high Metroplex is aproximately the same size as Fortress Maximus: The top of Max's head is higher but when Metroplex's antennae are pointed straight up they are above the height of Max. Where he beats Max is in the articulation stakes: Knees bend, thigh swivel, universal waist joint, rotating waist & head, shoulders that turn at the body and raise to the sides, bicep swivel, bending elbow, rotating wrist, four fingers that bend at the first knuckle and a thumb that folds sideways.
The fingers are a little interesting as they look like gun barrels. The concept art indicates these are meant to be guns which form a cannon in base mode, replaced by the one that folds out the hand on the actual toy. Both of his fold out gunner stations can still be used in robot mode, but only the one on his lift shoulder is naturally at the correct level to sit a figure in: you need to raise his right arm so it points forward and rotate the bicep in 90 degrees to use the one there. Perhaps a swivel bellow the elbow might have been useful as well.
Hidden in his chest, as per the original toy, is a moulded array of missiles which are revealed by folding down the flap on the left side of his chest. The top of this panel is coloured grey, which is different from the black of the rest of the chest fronts. Yes the detail matches the original Metroplex, but this new version has it's chest modified so both sides are shaped similarly: I want to remove the grey panel and paint it black!
Another feature present in the concept art has made it to the final toy but isn't documented: The white kneepads fold down, with the bottom locking into slots in the leg to form platforms for smaller figures to stand on. There's a 5mm hole in the middle of the platform and I want some sort of elevated post mounted weapon to go there. Anything on top of the hand adpators/risers I describe a bove would do but I'm tempted to raid my Micronauts boxes and get the missile launcher from the Giant Acroyear
Metroplex has light & sound features which are available in all modes: To set them off you press down on the control cabin at the top of the chest which causes the circle on his chest and his eyes to light up. Personally I think it might work better if the control cabin itself lit up! He either says a mixture of voice samples or produces a sound effect. The voice samples run in this order with the sound effects between them:
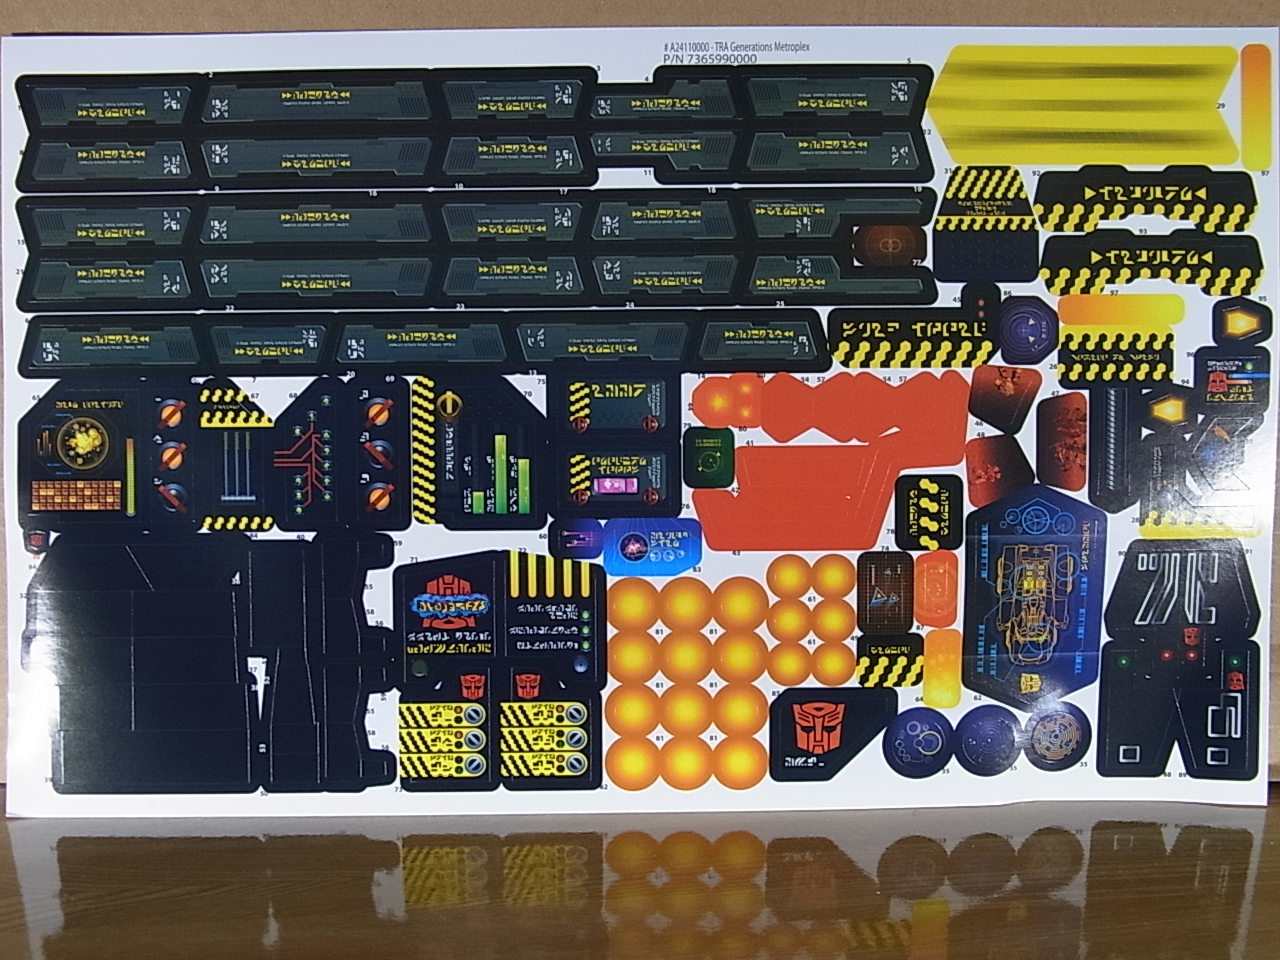
Metroplex heeds the call of the last Prime.Straight out the box Metroplex has few paint applications but is one of the first hasbro toys for a long while come with a sticker sheet to decorate the toy..... a VERY LARGE sticker sheet! I took one look at it and decided to give it a miss. To be honest the only ones I really miss are those for the cabin at the top of the chest but as I said above I'd rather this was clear light up plastic anyway!
Foolish Decepticons.
Decepticon deactivation commencing!
Target synchronizing initiated.
Target...obliterated.
These Decepticons scatter like cowards.
'Til All Are One.
The head on the toy, modelled after the original Metroplex but with a white face instead of the original chrome, is meant to have a couple of action features in it, but unfortunately neither works particularly well on mine. The antennae when raised & lowered are meant to raise and lower the visor. On mine it seems to be either up or down and personally I prefer it down over the eyes. Raising the panel at the back of the head reveals a small lever which rocks side to side. This moves the eyes in a manner similar to the eagle eye feature Action Man had. Unfortunately the effect is only noticeable when the eyes are lit up, and there's no way to make them stay lit up. Even when they are the effect is minimal. The plethora of 5mm and 3mm socket, plus the compatibility with smaller figures really makes you feel some thought has gone into playing with this toy with the rest of your Transformers collection
Summing up: I think Hasbro has learnt a lot of lessons from what is seen by many as the disastrous Optimus Maximus released the previous year. Metroplex has much better articulation, much better quality plastic, has many more features and is much much bigger. I really don't think you could hope for much more from a modern base mode toy. My two major problems are the ramp, which doesn't extend far enough in base mode, and the lack of a second gun, which I can easily see being a cost decision. What we've got is an excellent toy that actually feels like it's worth what we're being asked to pay for it. Adding anything else on, like a second gun or new versions of SixGun/Slammer, who were included with the original Metroplex, would have increased the costs of the toy.
Metroplex has had a lot of pictures taken of him. Alfe's Toy Blog has a number of entries on the toy covering various aspects:
2015 - unboxingAlso see the TMUK Generations Metroplex thread for pictures of the Metroplex, belonging to Bogatan of the Toy-Fu team, out on his adventures at Auto Assembly 2013.
2016 - city & vehicle mode
2017 - robot mode
2018 - gun & base mode
In the USA Metroplex was available on general release for $124.99.
The UK version of Generations Metroplex was released as a Toys R Us for $124.99. Unfortunately the UK version, identically packed to the US version, is missing the voice chip and only has the sound effects. To date there hasn't been any significant price reduction on the toy.
Third Party Add Ons
Metropolex has attacted a number of third part manufacturers with improvements and add ons: Before & After (BBTS), TFC Toy (BBTS) & Iron Factory have all produced versions of Six-Gun and/or Slammer. Uniquetoys Head, Radar & Turrets set (BBTS) isa something I'm not really sure I can see the point of. MMM Productions Hands and Ramp (BBTS) look useful, with the hands forming guns and the ramp addressing the concerns I've had above.But the item I have actually bought is X2 Toys Metroplex Guns. I bought the red version from BBTS to match the gun I already have with the toy but they also have a white version planned for production. As a second gun it's a really good match for the original: you have to look carefully to spot the differences. The X2toys version lacks a 5mm peg on the top of the toy, the missile & trigger but when Metroplex is holding the weapons together they look all but the same. A worth while buy by itself but it's also got a tank mode and a defence base mode which while they're so so are nice extras to have.
San Diego Comic Con Metroplex
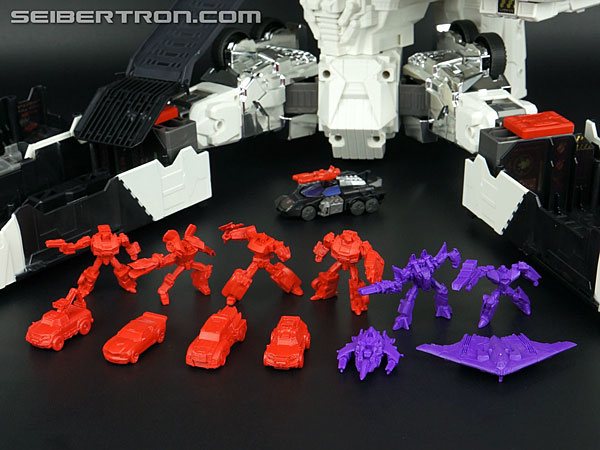
We now enter the world of the different versions of Generations Metroplex ..... and there are a few! Metropolex himself had made his retail début around the time of Botcon 2013 and just a few weeks later an exclusive version was revealed for sale at the San Diego Comic Con. The toy included several changes from the retail version:2 red guns instead of oneThis toy also included a set of 12 non transforming minifigures representing the robot and vehicle modes of the following toys:
Chromed face and thighs
Metallic stickers
Orion PaxThe Autobots are coloured red, the Decepticons purple in an effect similar to the decoys sold with certain 1986 & 1987 figures.
Bumblebee
Trailcutter
Hoist
Megatron
FOC Starscream
The SDCC version retailed for $149.99 and was numbered 01 of 30 in the Thrilling Thirty exclusive collection. For more pictures see Seibertron's SDCC Metroplex unboxing and TFW 2005's Metroplex SDCC Gallery
Takara-Tomy Generations Metroplex
In late September 2013 Metroplex was released as part of the Japanese Generations line. The Japanese version includes a number of changes from the US version:2 red guns instead of oneAlfe's Toy Blog has several different galleries showing this toy off:
Chromed face
Silver painted thighs and many different paint ops
Lower legs cast in white plastic instead of black
2073 - unboxing and comparison to SDCCMetroplex was Generations to TG-23 released on 28th September 2013.
2078 - gun and Scamper
2079 - with 1986 Metroplex & Trypticon. Robot Mode.
2080 - base mode crewed by small toys
2081 - vehicle mode
2085 - vehicle mode comparisons
2086 - crewed vehicle mode
2093 - robot mode in action
2094 - robot compared with US version
AGC Hong Kong 2013 Metroplex
Exclusive to Hong Kong's ACG-CON 2013 this Metroplex is identical to the SDCC Metroplex but with glossy stickers, and gold/silver decoys instead of red/purple.ACG-CON Metroplex is also included in the Thrilling 30 exclusive collection and is numbered 05 of 30. So to get the whole collection, which is yet to be completed, you have to buy TWO Metroplex's from different conventions on opposite sides of the globe.
Which Generations Metroplex do I own?
So how can you tell which version of Metroplex you own?Here's a simple guide:
| Toy | Face | Thighs | Guns | Stickers | Minifigures |
| Hasbro | White | White | 1 | Glossy | - |
| Takara-Tomy | Chromed | Grey | 2 | Glossy | - |
| SDCC | Chromed | Chromed | 2 | Metallic | Red/Purple |
| Hong Kong ACG-CON 2013 | Chromed | Chromed | 2 | Glossy | Gold/Silver |
Future Repaints
The obvious repaint for Metroplex is as the Japanese evil Destron repaint of the original Metrotitan. But I'd definitely want Micromaster ramp connections with that! Beyond that a number of other differently coloured Titans were featured in IDW comics in the 2012 More Than Meets The Eye & Robots In Disguise annuals and Dark Cybertron event.Could you retool him as Fortress Maximus? Maybe. But the retool would have to be quite extensive involving new legs, feet, his right chest and head
And, given that they've done Metroplex, I wonder how a Generations version of Trypticon would turn out?